How to Fix a Leaking Tap
A DIY Guide for Sydney Homeowners On How To Fix A Leaking Tap
A leaking tap can be more than just an annoyance. It wastes water, increases your water bill and can cause water damage to your home. Many homeowners believe fixing a leaking tap requires professional help, but that’s not always the case. With the right tools and a bit of know-how, you can often repair a leaky tap yourself, saving money and preventing further plumbing problems.
Addressing this common household issue quickly is crucial. A single dripping tap can waste thousands of litres of water annually, significantly impacting your water bill and the environment. By tackling the problem early, you’ll not only reduce your water usage but also prevent potential water damage to your sink, benchtop or surrounding areas.
This guide will walk you through the process of fixing a leaking tap step by step. Whether you’re dealing with a dripping kitchen sink or a leaky bathroom tap, you’ll learn how to identify the cause of the leak, gather the necessary tools, and make the repair. With a little patience and effort, you can restore your tap to proper working order and enjoy the satisfaction of a successful DIY repair.
Understanding The Components of a Tap
The handle is the visible part of the tap that users operate to control water flow. It connects to the spindle, which moves up and down to open or close the valve. At the base of the spindle sits the rubber tap washer, a small disc that creates a watertight seal when the tap is closed.
The O-ring is a rubber seal that prevents water from leaking around the spindle. The tap seat is the surface where the washer rests when the tap is closed. The tap bonnet holds the internal components in place and connects them to the tap body.
Hard water can cause mineral buildup on these parts, leading to corrosion and leaks. Regular maintenance helps prevent these issues and extends the life of your taps.
Common tap types include:
- Compression taps (traditional)
- Ceramic disc taps (modern)
- Mixer taps
Before reaching for your toolkit, it helps to understand why your tap is leaking. In Sydney, the most common causes of leaking taps are:
- Worn or damaged washers
- Faulty O-rings
- Corroded valve seats
- A worn ceramic cartridge in a mixer tap
Tools and Materials Needed To Fix Your Leaking Tap
- Adjustable spanner
- Replacement washers
- New O-rings
- Flathead and Phillips screwdrivers
- Needle-nose pliers
- A soft cloth or towel
- Bucket

Choosing Quality Replacement Parts
Selecting the right replacement parts is essential for a successful repair. Tap washers are the most common cause of leaking taps. Choose washers that match your tap size and type.
- O-rings seal connections and prevent leaks. Ensure you get the correct size and material for your tap model. It’s important to know how to replace O-rings properly.
- A jumper valve may need replacing if it’s worn or damaged. Check if your tap requires a specific type.
- Quality matters. Opt for parts from reputable manufacturers or plumbing supply stores. Cheap parts might save money initially but can lead to more frequent repairs. You can often find these at your local hardware store.
Consider applying a small amount of tap lubricant, plumber's grease or petroleum jelly to help prevent future leaks and make future repairs easier.
Our Step-by-Step Guide To Repairing Your Leaking Tap
Step 1: Turn Off The Water Supply
Before getting stuck into this DIY, it's important to turn off your home’s water supply. Have a look underneath your sink for the isolation valve and turn it clockwise to shut off the hot and cold water. Alternatively, you can turn off your entire home’s water at the main water supply unit.
Once the water has been turned off, open the tap to drain any remaining water and pressure from the pipes.
Step 2: Remove The Tap Handle
Using a screwdriver, remove the decorative cap from your tap. Unscrew the handle and gently lift it up and off.
Step 3: Disassemble The Tap
Grab your adjustable spanner and loosen the nut bonnet covering the spindle. Carefully unscrew and remove the spindle. Put these parts on your towel and take a picture of them, keeping note of how they fit together, as you will have to reassemble them later.
Step 4: Inspect The Internal Components
Examine the internal parts of your tap, including the washer, cartridges and spindle for signs of wear and tear, corrosion, cracks or damage. Identifying the faulty components will help you to figure out what needs to be replaced or repaired.
Step 5: Replace The Damaged Washer Or Cartridge
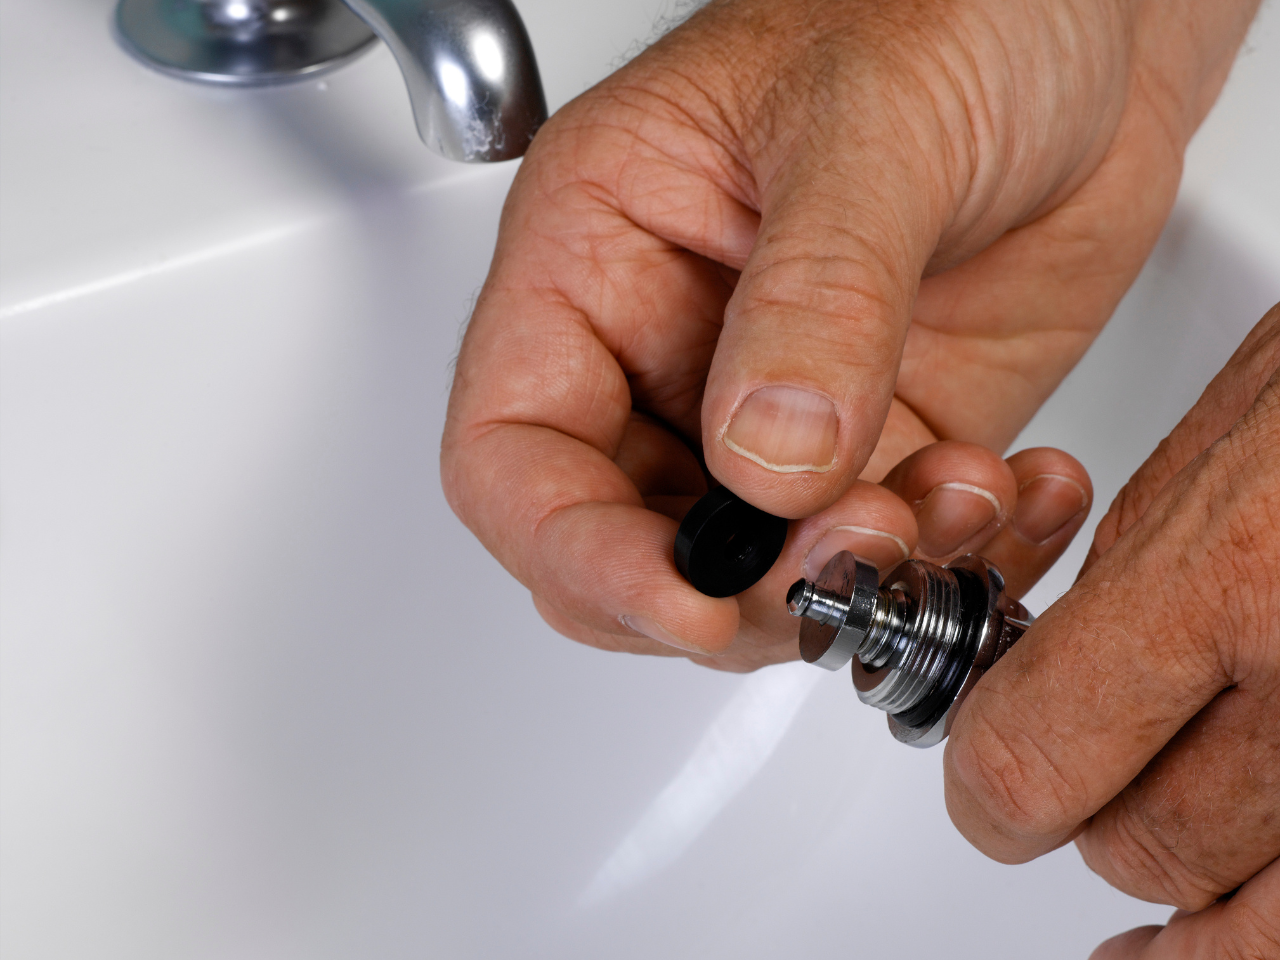
At the bottom of the spindle sits the washer. Washers are held in place with a small screw. To check if it’s damaged, unscrew the screw and take the washer out. To keep your tap working properly, you should replace the washers and cartridges every 2 - 3 years.
Step 6: Reassemble The Tap
Now it’s time to reassemble the tap. Make sure to avoid over-tightening the fittings as this can damage your tap and affect its performance.
Step 7: Turn The Water Back On And Test
Once you have reassembled your tap, it's time to test it out. Turn the tap on slowly and observe for drips and leaks.
Preventive Measures and Maintenance
Regular tap care and smart habits can significantly reduce the risk of leaks and extend the life of your taps. Proper maintenance helps prevent corrosion, minimises wear and tear, and addresses issues like hard water buildup.
Regular Inspection and Cleaning
- Check your taps monthly for signs of wear or damage. Look for mineral deposits, rust, or loose components. Clean tap aerators regularly to prevent blockages and ensure smooth water flow.
- For hard water areas, use a vinegar solution to remove limescale. Mix equal parts white vinegar and water, soak affected parts for an hour, and then scrub gently.
- Inspect washers and O-rings for signs of deterioration. Replace worn washers promptly to prevent leaks. Lubricate moving parts with silicone-based grease to reduce friction and wear.
- Monitor water pressure. Excessively high pressure can strain taps and pipes. Consider installing a pressure-reducing valve if needed.
Avoiding Common Mistakes
- Don’t overtighten taps when turning them off. This can damage washers and cause leaks. Use gentle pressure to close the taps fully.
- Avoid using harsh chemicals or abrasive cleaners on taps. These can corrode metal surfaces and damage finishes. Choose mild, tap-safe cleaning products instead.
- Never ignore small drips or leaks . Address issues promptly to prevent water waste and more extensive damage. Early intervention can save time and money in the long run.
- Be cautious when using tools near taps. Accidental knocks or scratches can compromise the tap’s integrity. Use protective coverings when working around taps during renovations.
When to Call a Professional Plumber?
Fixing a leaking tap often requires expert knowledge and specialised tools. Recognising the limits of DIY repairs and identifying complex plumbing issues are crucial for homeowners. If your tap is still leaking despite repeated DIY attempts, broken or corroded or you are having trouble accessing the internal parts of your tap, then it's time to call in the professionals.
With over 40 years of industry experience, our licensed plumbers are ready to repair all kinds of leaking taps from bathroom and kitchen taps to laundry and garden taps. No matter how complicated the leak is, our plumbers have the tools and expertise to repair it quickly and effectively.